
Essential Attachments for Your Broom Vacuum: A Buyer’s Guide
One great way to expand the functionality of your broom vacuum is by utilizing useful attachments and accessories. The right attachments allow you to clean

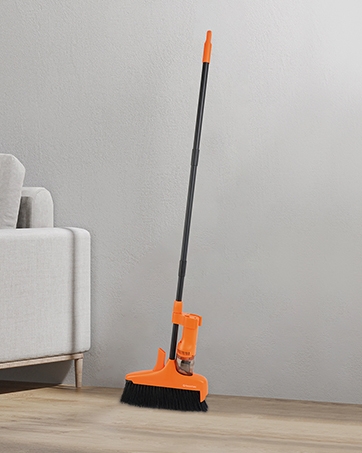
The broom vacuum, a staple in modern households, has transformed the way we approach cleaning, offering a blend of convenience and efficiency.
However, like all appliances, its performance is directly tied to how well it’s maintained. A well-kept vacuum not only ensures optimal cleaning results but also extends the device’s lifespan, saving time and money in the long run.
But what does it truly mean to maintain a broom vacuum? Are there specific routines to follow or common pitfalls to avoid? Whether you’re a proud new owner or a long-time user seeking to rejuvenate your trusty device, understanding the essentials of vacuum maintenance is crucial.
In this guide, we’ll navigate the ins and outs of broom vacuum care, offering actionable tips and insights to keep your machine running smoothly. Dive in and discover the secrets to maximizing your vacuum’s potential and ensuring it remains a reliable cleaning companion for years to come.
To properly maintain your broom vacuum, you should understand its key components:
The motor provides suction power by spinning fans to create airflow through the vacuum. Maintaining adequate airflow is vital.
Filters trap dust and allergens while allowing filtered air to pass through. Clean filters are needed for strong suction.
The spinning brush roll loosens and lifts debris from floors. Removing tangles preserves brushroll functionality.
This container accumulates all vacuumed debris. Avoid overfilling to maintain suction.
Rechargeable lithium-ion batteries power the motor. Proper charging and care maximizes battery lifespan.
Bonus attachments aid cleaning tasks. Ensure attachments are cleared of blockages.
Understanding how these components operate and interconnect helps guide proper broom vacuum maintenance.
Clean filters are one of the most important maintenance tasks for optimal performance. Here are tips for filter upkeep:
It’s also important to periodically inspect and clean vacuum brushrolls. Follow these tips:
For bagless broom vacuums, correct dust cup emptying methods also help maintain performance:
Following these steps when emptying dust cups helps maintain suction power and extend the time between thorough vacuum cleanings.
An occasional deep clean restores full performance. Follow this process:
Thoroughly wash all filters with water until rinse water runs clear. Allow you to fully air dry.
Inspect brush rolls and cut away all tangled debris like hair and threads. Rinse if needed.
Wipe the vacuum body, hoses, wands and attachments with a dry cloth.
Inspect air channels for obstructions and carefully remove any debris buildup.
Replace any worn components like brushrolls or filters.
Dump out debris, wash filters, wipe down the cup interior and reassemble.
Performing this detailed cleaning every few months keeps your vacuum in peak cleaning condition.

For cordless stick vacuums, properly maintaining batteries is also essential:
Here are some common vacuum problems and troubleshooting steps:
Diminished Suction
Battery won’t Hold Charge
Vacuum Won’t Turn On
Loud Noise While Operating
Addressing issues promptly helps prevent further damage and maintain cleaning effectiveness.
With normal wear, certain components will eventually need replacement. Common replacement parts include:
Only use authentic OEM replacement parts to maintain safety, fit, and performance. Avoid cheap generic off-brand parts. Purchase replacements from the manufacturer, authorized dealers, or reputable retailers like Amazon.
Use these tips to properly store your broom vacuum between uses:
Proper storage helps maintain vacuum appearance and performance.
While you can troubleshoot many basic issues yourself, it’s safest to have an authorized vacuum repair shop address complex problems like:
Avoid attempting DIY repairs on these major issues due to safety risks and likely inadequate repairs. The cost of professional service is worthwhile to restore normal vacuum functionality and lifespan.
Maintain your broom vacuum according to manufacturer guidelines. Keep the user manual accessible for key maintenance reminders and troubleshooting advice specific to your model.
Maintaining your broom vacuum isn’t merely a task; it’s an investment in the longevity and efficiency of a device that plays a pivotal role in home cleanliness. As we’ve journeyed through the essentials of vacuum care, it becomes evident that regular maintenance not only ensures peak performance but also safeguards against premature wear and potential malfunctions.
By adopting the practices and precautions outlined, users can derive maximum value from their vacuums, ensuring consistent and effective cleaning sessions.
Moreover, a well-maintained vacuum contributes to a healthier living environment by effectively trapping dust, allergens, and other particulates. In conclusion, the relationship between a homeowner and their broom vacuum is symbiotic.
The care and attention you invest in your device are reciprocated through its enhanced functionality and extended service life. Embrace the principles of proactive maintenance, and your broom vacuum will undoubtedly stand the test of time, continuing to serve as an indispensable ally in your quest for a pristine home.
Remember, a little effort today can prevent challenges tomorrow, ensuring your cleaning routines remain uninterrupted and efficient.

One great way to expand the functionality of your broom vacuum is by utilizing useful attachments and accessories. The right attachments allow you to clean

The world of broom vacuums has seen a plethora of innovations, but one debate that remains at the forefront is the choice between bagged and

In today’s fast-paced world, cordless broom vacuums have emerged as a household essential, offering unparalleled convenience and mobility. However, one common concern among users is

Broom vacuums, also commonly known as stick vacuums, are a popular choice for convenient whole-home cleaning. With their lightweight designs and versatile capabilities, broom vacuums

One great way to expand the functionality of your broom vacuum is by utilizing useful attachments and accessories. The right attachments allow you to clean
The broom vacuum, a staple in modern households, has transformed the way we approach cleaning, offering a blend of convenience and efficiency. However, like all

The world of broom vacuums has seen a plethora of innovations, but one debate that remains at the forefront is the choice between bagged and

In today’s fast-paced world, cordless broom vacuums have emerged as a household essential, offering unparalleled convenience and mobility. However, one common concern among users is